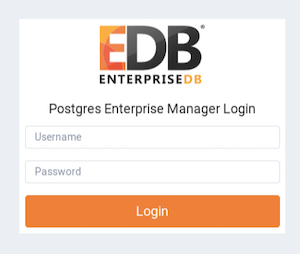
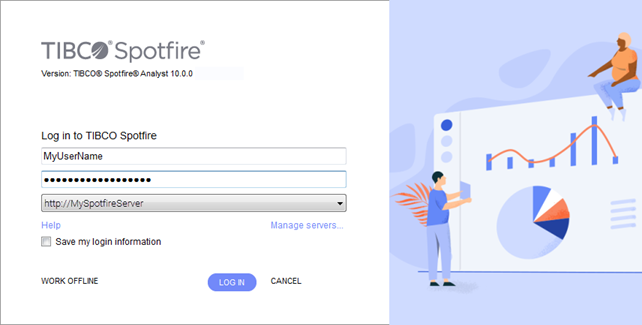
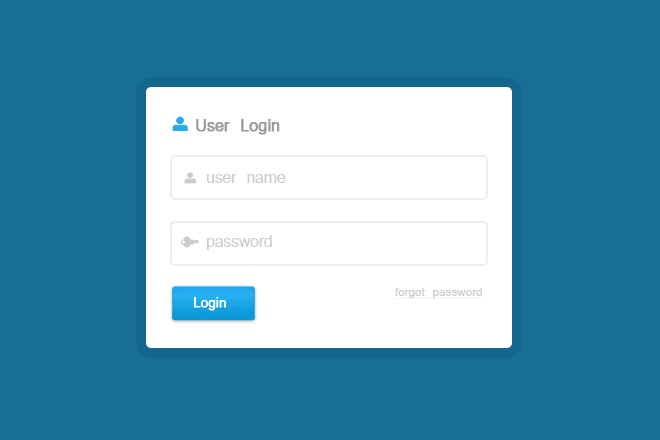
Today’s article is a bit of fun. We are looking at the four levels of styling a simple logon dialog. These UI components are pretty ubiquitous. Here are a few examples of HTML logon dialogs
Level 1 – basic styling
They all share the same elements, at the minimum two input boxes, an OK button and usually a cancel button. Sometimes there are labels next to each input box. Other times placeholder text is shown in the input controls which gets replaced with whatever you type into the input control. In addition there is often a link to reset the password should it be forgotten.
With this in mind our logon dialog will have two input controls with placeholder text, a single button and a link to reset a forgotten password. Let’s get to work. Our level 1 logon dialog will be vanilla. Some HTML and very little CSS. The CSS is there just to layout the control on the page. Here is our basic HTML.
<html lang="en">
	<head>
		<meta charset="utf-8">
		<title>Login</title>
		<meta name="description" content="Login to your account">
		<meta name="author" content="Jonathan">
		<link rel="stylesheet" href="css/styles.css?v=1.0">
	</head>
	<body>
		<div class="container">
			<div class="log-form">
				<h2>Login to your account</h2>
				<form>
					<input type="text" title="username" placeholder="username" />
					<input type="password" title="password" placeholder="password" />
					<button type="submit" class="btn">Login</button>
					<a class="forgot" href="#">Forgot Username?</a>
				</form>
			</div>
		</div>
	</body>
</html>
Nothing out of the ordinary here. We have defined a container div to allow it to be centred on the page. Inside this div we have another div which holds a standard form element. The form element has two input tags, a button and an anchor. All nice and simple. Let’s now take a look at the CSS
.container {
  display: flex;
  align-items: center;
  justify-content: center;
  height: 100%;
  width: 100%;
}

form {
  width: 100%;
}

input {
  display: block;
  width: 100%;
  margin-bottom: 2em;
  padding: .5em 0;
}

.btn {
  padding: .5em 2em;
}
The container div is styled to fit the whole browser and uses the flex layout to easily centre the logon dialog vertically and horizontally. Note the height and width need to be 100% for this to work. The rest of the CSS is concerned with adding padding and margins to space out the elements in the dialog. This is the result.
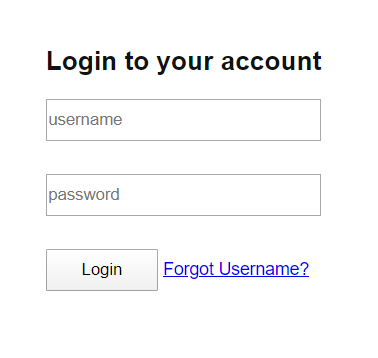
Yes it is functional but does it look good? Not really. I’d score it a C and that’s pushing it. The next thing to do is ‘style it up’. Add colours and make it pop. The first thing to do is choose a colour scheme. It’s Summer here in the UK at the moment and the sun is out so I’m thinking orange…let’s get going onto level 2.
Level 2 – style it up
* {
  box-sizing: border-box;
}

body {
  background-color: #ff9800ad;
}

.container {
  align-items: center;
  display: flex;
  justify-content: center;
  height: 100%;
  width: 100%;
}

.log-form {
  position: relative;
  width: 40%;
  background: #fff;
  box-shadow: 0px 2px 5px rgba(0, 0, 0, .25);
}

form {
  width: 100%;
  padding: 2em;
}

h2 {
  color: rgb(255, 87, 34);
  font-size: 1.35em;
  display: block;
  width: 100%;
  text-transform: uppercase;
  padding: 1em;
  margin: 0;
  font-weight: 200;
}

input {
  display: block;
  width: 100%;
  margin-bottom: 2em;
  padding: .5em 0;
  border: none;
  border-bottom: 1px solid #eaeaea;
  padding-bottom: 1.25em;
  color: #757575;
}

.btn {
  display: inline-block;
  background: rgb(255, 87, 34);
  border: none;
  padding: .5em 2em;
  color: white;
  margin-right: .5em;
  box-shadow: inset 0px 1px 0px whitesmoke;
}

.forgot {
  display: flex;
  justify-content: flex-end;
  color: rgb(255, 87, 34);
  font-size: .75em;
  width: 100%;
  transition: color 0.2s ease-in 0s;
}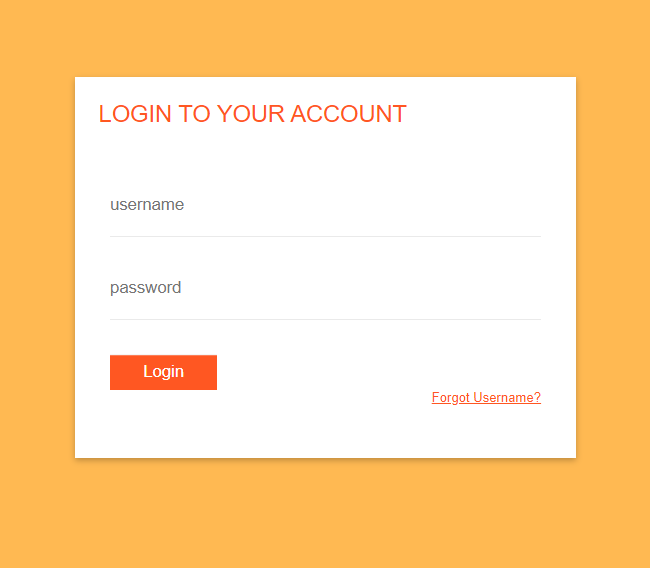
This is much better. We have a bright background with the dialog centred as before. The dialog has been lifted by introducing a shadow effect around it. The clunky inputs have been styled with a single clean line and the text has been given a deep orange colour to complement the background. The vanilla old skool button has been replaced with a solid orange rectangle with white text. This is all good but look what happens when we navigate around the dialog.
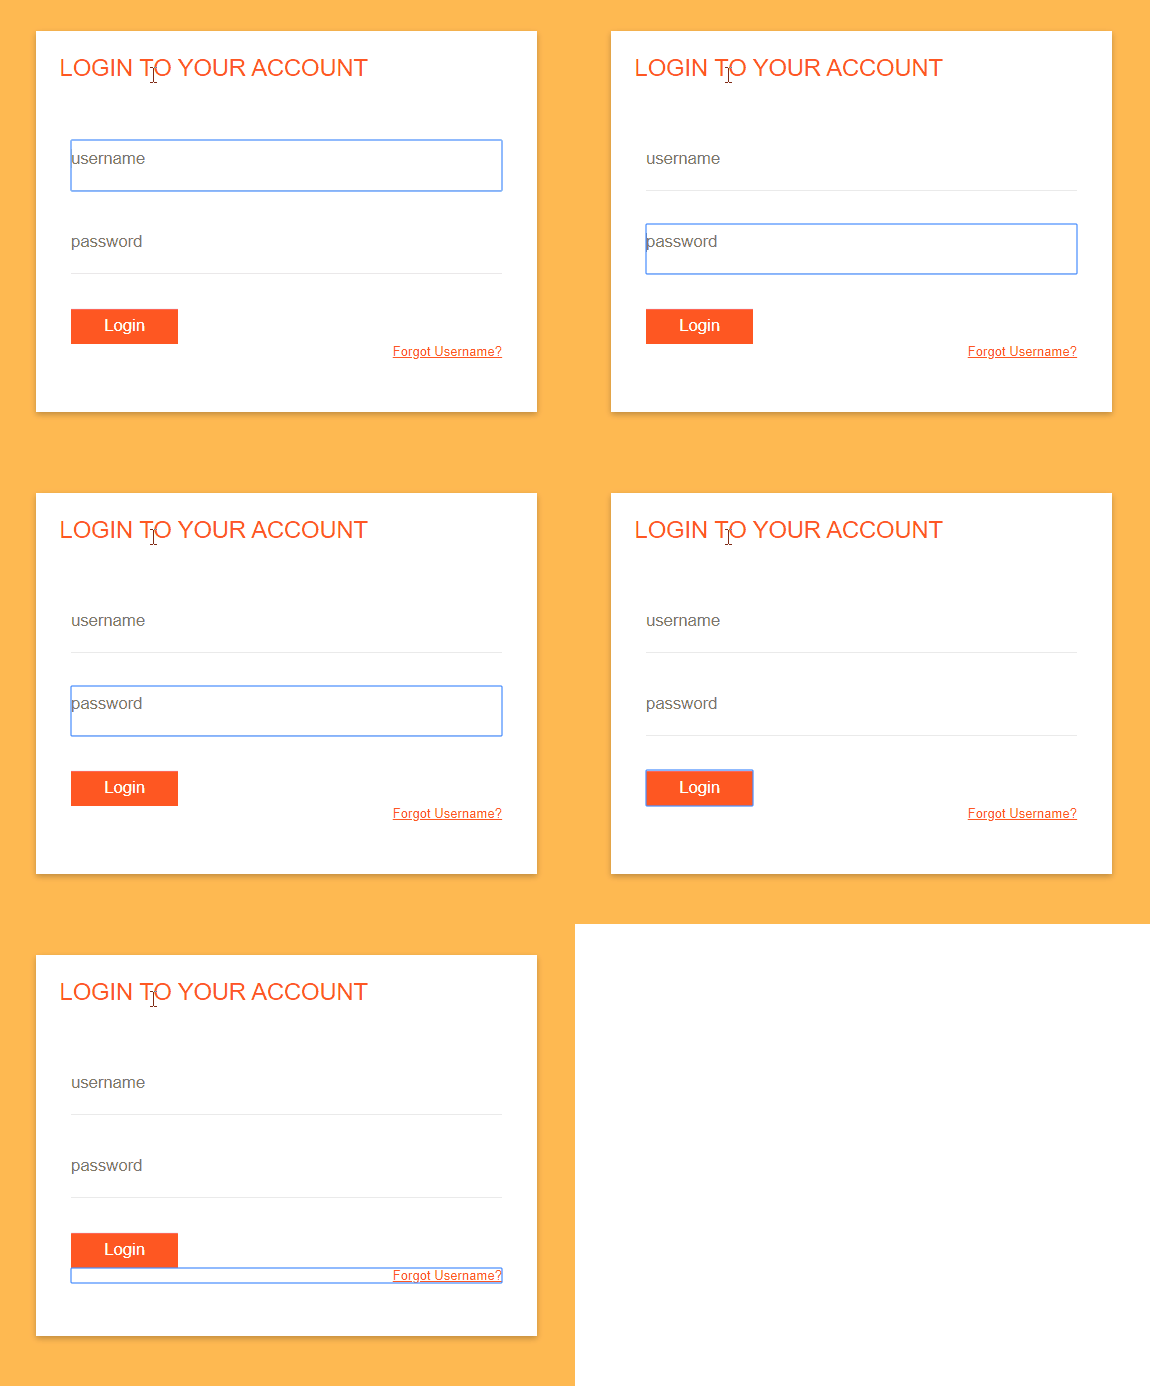
The default blue focus outlines do not look right with the new dialog theme. Luckily we can do something about that.
Level 3 – add some finesse
While the level 2 version of our dialog looked good, but in use the default browser behaviour let it down. So for the next level we are going to provide custom styling to handle the form interactivity. At the same time we are going to add some pleasing animation to really finesse our dialog.
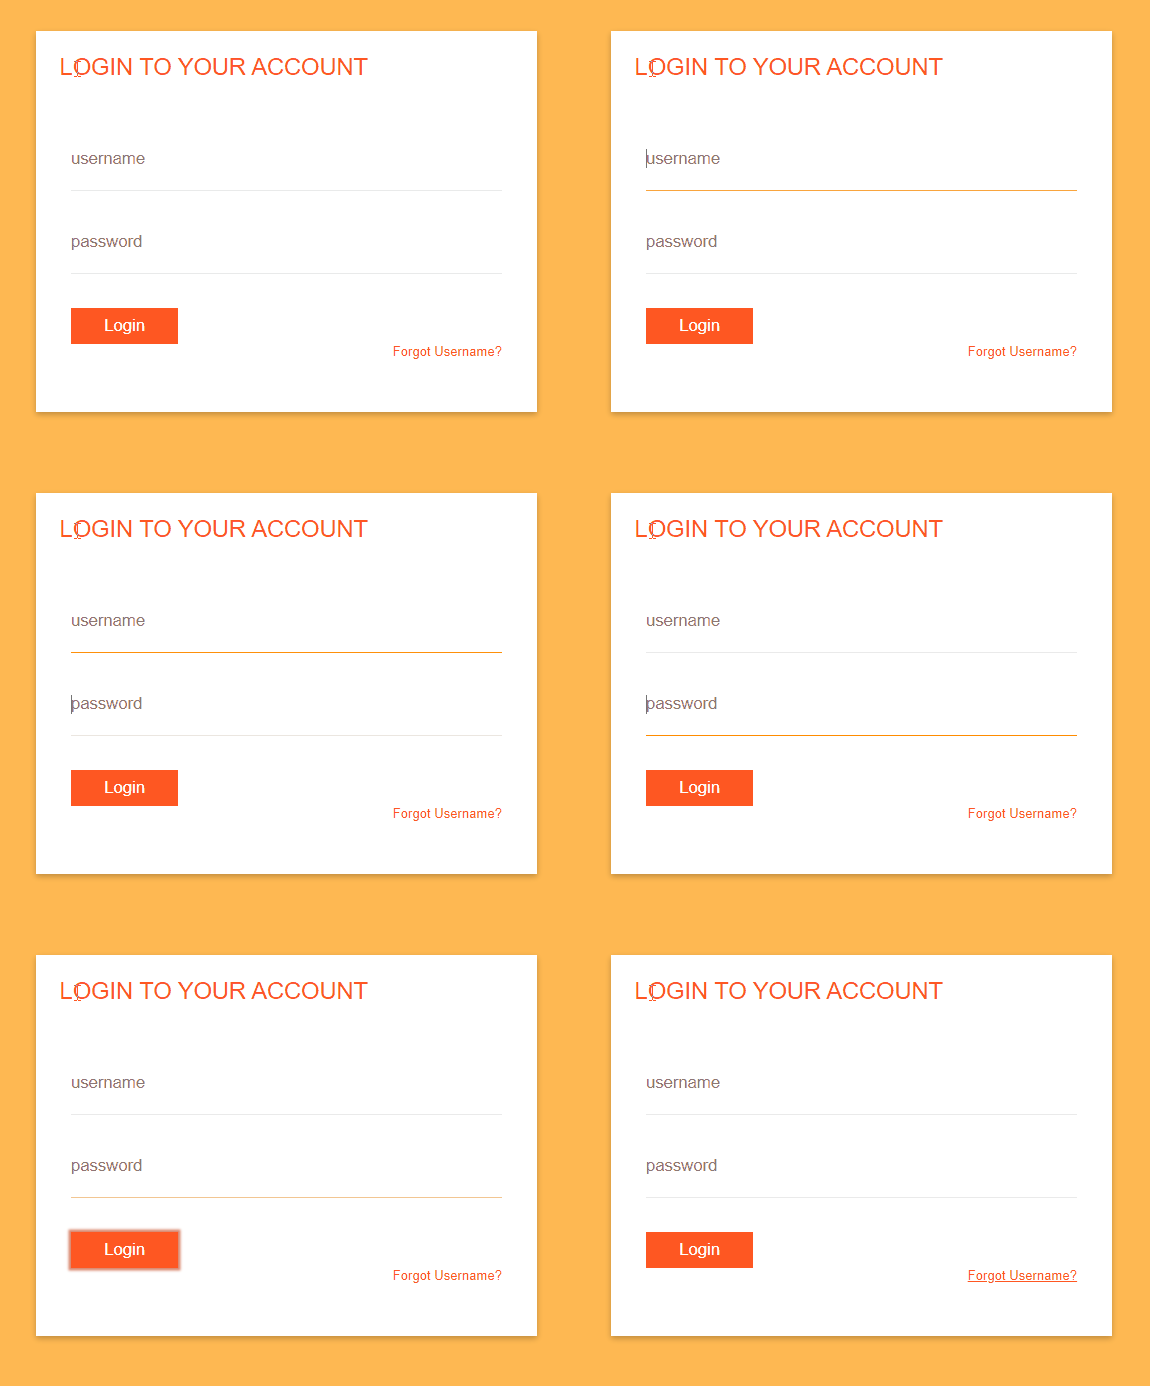
The CSS focus, active and hover pseudo selectors have been added along with animated transitions when moving between state. To highlight the button when it has focus I have added a box-shadow to act as a ‘focus ring’ around the button. The link now adds an underline style when it has focus. Here is the complete CSS.
* {
  box-sizing: border-box;
}

body {
  background-color: #ff9800ad;
}

.container {
  align-items: center;
  display: flex;
  justify-content: center;
  height: 100%;
  width: 100%;
}

.log-form {
  position: relative;
  width: 40%;
  background: #fff;
  box-shadow: 0px 2px 5px rgba(0, 0, 0, .25);
}

form {
  width: 100%;
  padding: 2em;
}

h2 {
  color: rgb(255, 87, 34);
  font-size: 1.35em;
  display: block;
  width: 100%;
  text-transform: uppercase;
  padding: 1em;
  margin: 0;
  font-weight: 200;
}

input {
  display: block;
  width: 100%;
  margin-bottom: 2em;
  padding: .5em 0;
  border: none;
  border-bottom: 1px solid #eaeaea;
  padding-bottom: 1.25em;
  color: #757575;
  transition: border-bottom 0.2s ease-in 0s;
}

input:focus,
input:hover {
  outline: none;
  border-bottom: 1px solid darkorange;
}

.btn {
  display: inline-block;
  background: rgb(255, 87, 34);
  border: none;
  padding: .5em 2em;
  color: white;
  margin-right: .5em;
  box-shadow: inset 0px 1px 0px whitesmoke;
  transition-property: background,box-shadow;
  transition-duration: 0.1s;
  transition-timing-function: ease-in;
  box-shadow: none;
}

.btn:hover {
  background: rgba(255, 87, 34, 0.8);
}

.btn:focus {
  outline:none;
  box-shadow: 0px 0px 2px 2px rgba(191,54,12,0.6);
}

.btn:active {
  background: #bf360c;
  box-shadow: inset 0px 1px 1px #bf360c;
}

.forgot {
  display: flex;
  justify-content: flex-end;
  color: rgb(255, 87, 34);
  font-size: .75em;
  text-decoration-line: none;
  width: 100%;
  transition: color 0.2s ease-in 0s;
}

.forgot:focus {
  text-decoration-line: underline;
  outline: none;
}

.forgot:hover {
  color: rgba(255, 87, 34, 0.8);
}

.forgot:active {
  color: #bf360c;
}
Level 4 – animate it
I though it would be cool to have a bouncing effect when the page is loaded. So the dialog jumps up and bounces ‘down’ onto the screen. This is fairly straightforward to do using animation keyframes.
The animation is referenced in the log-form class by supplying the name and duration. This tells the animation what element it is going to animate.
.log-form {
  animation-duration:1s;
  animation-name: bounce;
  width: 40%;
  background: #fff;
  box-shadow: 0px 2px 5px rgba(0, 0, 0, .25);
}
Here the animation is called bounce, the timing function allows you to define how the animation moves. Details here. Next you define the animation using the @keyframes keyword in your CSS file.
@keyframes bounce {
  0%   { transform: scale(1,1)    translateY(0); }
  10%  { transform: scale(1.1,.9) translateY(0); }
  30%  { transform: scale(.9,1.1) translateY(-100px); }
  50%  { transform: scale(1,1)    translateY(0); }
  57%  { transform: scale(1,1)    translateY(-7px); }
  64%  { transform: scale(1,1)    translateY(0); }
  100% { transform: scale(1,1)    translateY(0); }
}
The @keyframes keyword defines to do and when to do it. So in the example above at 10% we are squatting down to jump by making the dialog shorter and fatter. At 30% the dialog jumps by springing up. In doing so it becomes thinner and taller. At halfway we land on the ground before doing a little bounce after landing. This makes more sense seen in slow motion followed by the faster version.
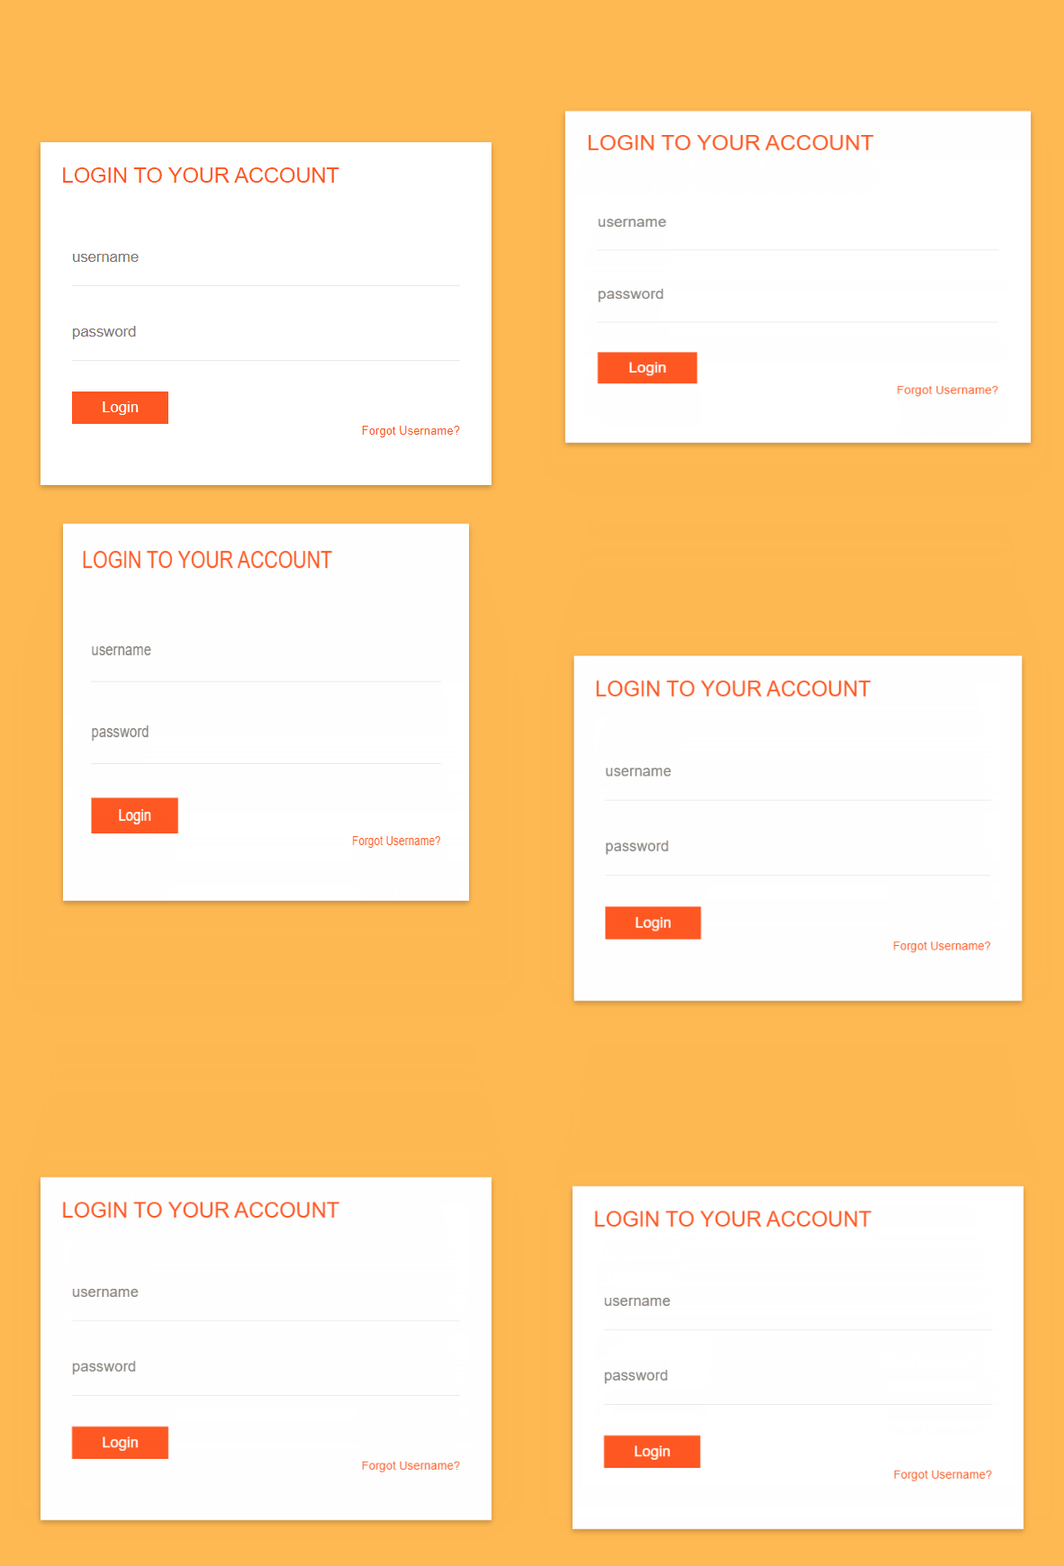
The transform property allows you to rotate, scale, skew or translate(move) an element. In this case we are using a combination of scale and translate.
Here is the full CSS
* {
  box-sizing: border-box;
}

body {
  background-color: #ff9800ad;
}

.container {
  align-items: center;
  display: flex;
  justify-content: center;
  height: 100%;
  width: 100%;
}

.log-form {
  animation-duration:1s;
  animation-name: bounce;
  animation-timing-function: ease;
  width: 40%;
  background: #fff;
  box-shadow: 0px 2px 5px rgba(0, 0, 0, .25);
}

@keyframes bounce {
  0%   { transform: scale(1,1)    translateY(0); }
  10%  { transform: scale(1.1,.9) translateY(0); }
  30%  { transform: scale(.9,1.1) translateY(-100px); }
  50%  { transform: scale(1,1)    translateY(0); }
  57%  { transform: scale(1,1)    translateY(-10px); }
  64%  { transform: scale(1,1)    translateY(0); }
  100%  { transform: scale(1,1)    translateY(0); }
}

form {
  width: 100%;
  padding: 2em;
}

h2 {
  color: rgb(255, 87, 34);
  font-size: 1.35em;
  display: block;
  width: 100%;
  text-transform: uppercase;
  padding: 1em;
  margin: 0;
  font-weight: 200;
}

input {
  display: block;
  width: 100%;
  margin-bottom: 2em;
  padding: .5em 0;
  border: none;
  border-bottom: 1px solid #eaeaea;
  padding-bottom: 1.25em;
  color: #757575;
  color: rgb(255, 87, 34);
  transition: border-bottom 0.2s ease-in 0s;
}

input:focus,
input:hover {
  outline: none;
  border-bottom: 1px solid darkorange;
}

.btn {
  display: inline-block;
  background: rgb(255, 87, 34);
  border: none;
  padding: .5em 2em;
  color: white;
  margin-right: .5em;
  box-shadow: inset 0px 1px 0px whitesmoke;
  transition-property: background,box-shadow;
  transition-duration: 0.1s;
  transition-timing-function: ease-in;
  box-shadow: none;
}

.btn:hover {
  background: rgba(255, 87, 34, 0.8);
}

.btn:focus {
  outline:none;
  -webkit-box-shadow: 0px 0px 2px 2px rgba(191,54,12,0.6);
  -moz-box-shadow: 0px 0px 2px 2px rgba(191,54,12,0.6);
  box-shadow: 0px 0px 2px 2px rgba(191,54,12,0.6);
}

.btn:active {
  background: #bf360c;
  box-shadow: inset 0px 1px 1px #bf360c;
}

.forgot {
  display: flex;
  justify-content: flex-end;
  color: rgb(255, 87, 34);
  font-size: .75em;
  text-decoration-line: none;
  width: 100%;
  transition: color 0.2s ease-in 0s;
}

.forgot:focus {
  text-decoration-line: underline;
  outline: none;
}

.forgot:hover {
  color: rgba(255, 87, 34, 0.8);
}

.forgot:active {
  color: #bf360c;
}
So there we have it. Zero to hero in four steps. Enjoy!

