Have you ever wondered how to create a Chrome extension? What magic happens under the hood? Well look no further. I am going to walk you through a simple Chrome extension which hopefully will give you enough information to get you started writing your own. The code can be found here.
The problem
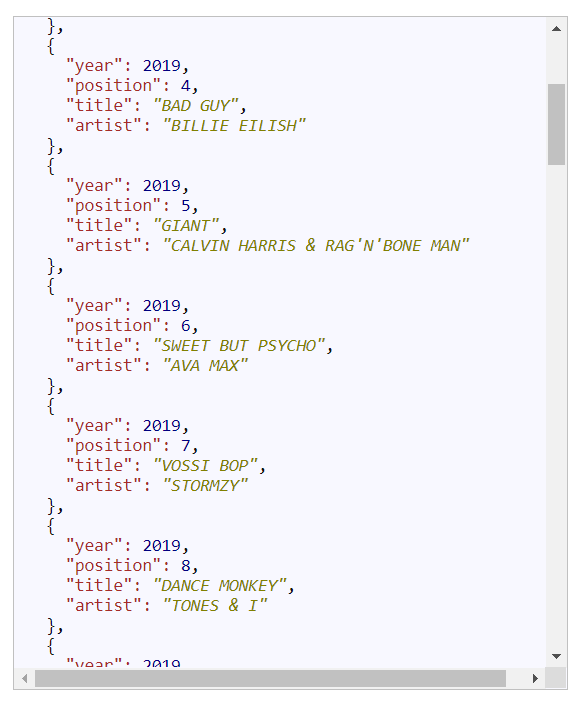
I have written a node.js server which uses a REST API to give me the top 40 music charts for the UK. This serves up JSON as shown below. I want to know where Stormzy placed in 2019. Scanning down the page it takes me a little while to find that Stormzy was the number 7 top seller for 2019. Impressive.
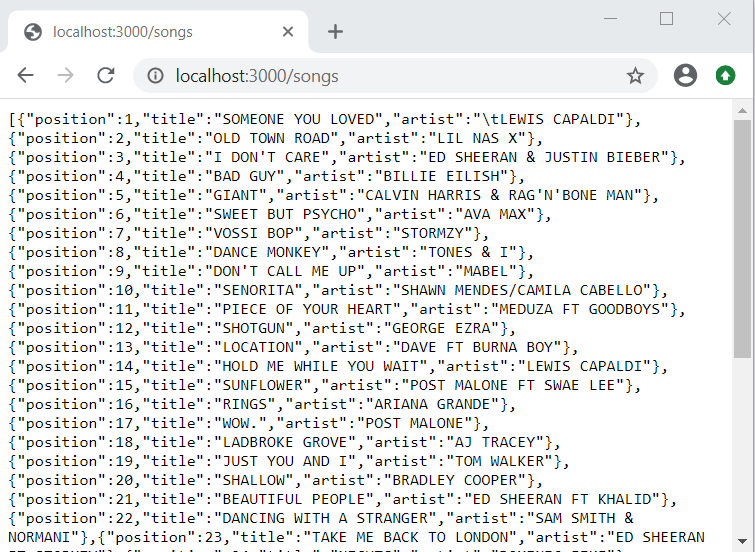
It was a little difficult to find what I was looking for. What I would really like to do is pretty print the JSON directly in the browser. Let’s start working on our extension.
What is an Extension?
An extension is a small program written in Javascript, HTML and CSS which modifies and enhances the browser functionality.
Google has provided a full, feature-rich API which provides the means to build complex browser extensions. For my extension I didn’t need all the bells and whistles, but simply a way to intercept a browser page and change the HTML. Google has provided a way of doing this using content scripts.
Check out for extensions API here http://developer.chrome.com/extensions. You can see what extensions are installed locally by typing <a href="chrome://extensions/">chrome://extensions/</a> into the browser bar.
Let’s get going
One of the most important files is called the <a rel="noreferrer noopener" href="https://developer.chrome.com/extensions/manifest" target="_blank">manifest.json</a>. This file defines the code that is run when the page is loaded.
{
	"manifest_version": 2,
	"name": "JSON Formatter",
	"version": "1.0",

	"description": "Format JSON",

	"page_action": {
		"default_icon": "icon.png"
	},

	"content_scripts": [{
		"matches": ["<all_urls>"],
		"css": ["content.css"],
		"js": ["content.js"]
	}]
}
The manifest is simple enough for this extension. The manifest_version, name and version string are mandatory.
Next we have two possible options, page_action or browser_action. Both place an icon in the tool bar but operate in different scopes. The first is applicable for actions that take place in the current page only. e.g. subscribing to a page’s RSS feed. The second is applicable for all pages. Be aware that page actions are not always visible depending on their context whereas when using browser_action the icon is always available. For our extension we will use page_action. Inside this property we can also define an icon that is displayed in the toolbar. For designing icons I recommend https://www.canva.com/.
content_scripts defines the code that gets executed for a particular page in the browser. They have access to the DOM and can modify it. The ‘matches’ property is used to restrict the extension to those URLs that we know will return valid JSON. In this case we don’t care and allow all pages access to the extension. When a match is found, the content.js file will be run allowing it to access and change the page content. Before we dive into the main script file we also need to define our styles.
content.css
Styling is done courtesy of a simple stylesheet to highlight JSON key-value pairs and text/numeric content. Note: be sure to scope your CSS styles.
.json-pretty-print {
   color: #111;
   font-family: 'Helvetica Neue', sans-serif; font-size: 14px; font-weight: 500;
   background-color: ghostwhite;
   border: 1px solid silver;
   padding: 10px;
   margin: 20px;
   overflow: auto;
   height:90%;
}

.json-pretty-print .json-key {
   color: brown;
   }
.json-pretty-print .json-value-int {
   color: navy;
   }
.json-pretty-print .json-value-str {
   color: olive;
   font-style: italic;
}
content.js
I took the liberty of scouring the internet for a suitable fiddle to perform the pretty printing of the JSON. I’ve slightly modified it to use classes instead of embedded styles. The original fiddle can be found here.
// http://jsfiddle.net/alanwsmith/EwT4E/
function jsonPrettyHighlight(_jsonObj) {

    var json = JSON.stringify(_jsonObj, undefined, 2);

    json = json.replace(/&/g, '&').replace(/</g, '<').replace(/>/g, '>');
    json = json.replace(/("(\\u[a-zA-Z0-9]{4}|\\[^u]|[^\\"])*"(\s*:)?|\b(true|false|null)\b|-?\d+(?:\.\d*)?(?:[eE][+\-]?\d+)?)/g, function (match) {
        var cls = 'json-value-int';
        if (/^"/.test(match)) {
            if (/:$/.test(match)) {
                cls = 'json-key';
            } else {
                cls = 'json-value-str';
            }
        }
        return '<span class="' + cls + '">' + match + '</span>';
    });
    return json;
}


try {
    jsonObject = JSON.parse(document.body.innerText);
    if (jsonObject) {

        var prettyPrintedJson = jsonPrettyHighlight(jsonObject);
        var container = document.createElement("pre");
        container.classList.add("json-pretty-print")
        document.body.firstChild.style.display = "none";

        container.innerHTML = prettyPrintedJson;
        document.body.appendChild(container);
    }
} catch (ex) {
    // do nothing, the current page is not altered
}
The bulk of the work is done in the function jsonPrettyHighlight. The code in the try block grabs whatever is in the current web page and tries to parse it. In our manifest.js we do not limit the page based on the URL so it could contain anything. If the parse fails then the page is untouched.
If we happen to have a pukka JSON object then we pass it to the pretty print function, which returns an HTML string. Note that the original JSON is already returned so we can either delete it from the DOM or as I have done simply hide it. The final step is to wrap the string in <pre> tags to preserve tabs and the such-like before appending it to the document body.
Installing the extension
To install the plugin open the extensions tab by clicking the ‘burger’ menu in Chrome, which can be found in the top-right of the window just below the Close icon. Select More tools->Extensions. Another way is to open a new tab and type chrome://extensions/.
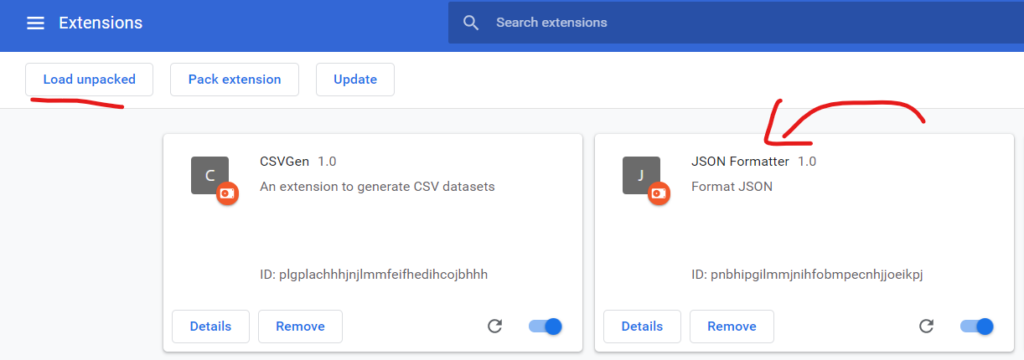
Once the extensions tab is open click the ‘Load unpacked’ button and locate the directory where you saved you extension files. If all is well the page will refresh and you will see your extension listed.
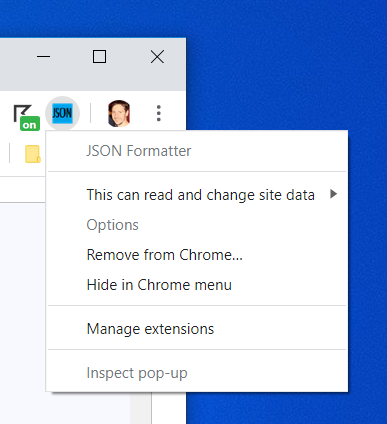
The icon specified in the manifest will be displayed on the toolbar. Right-click the icon to remove the extension or hide it from the toolbar
Running the extension
To run the extension simply navigate to a URL that returns JSON and you should see the page nicely formatted. I think you’ll agree this looks much better than before. Now where is that Stormzy listing…
Debugging
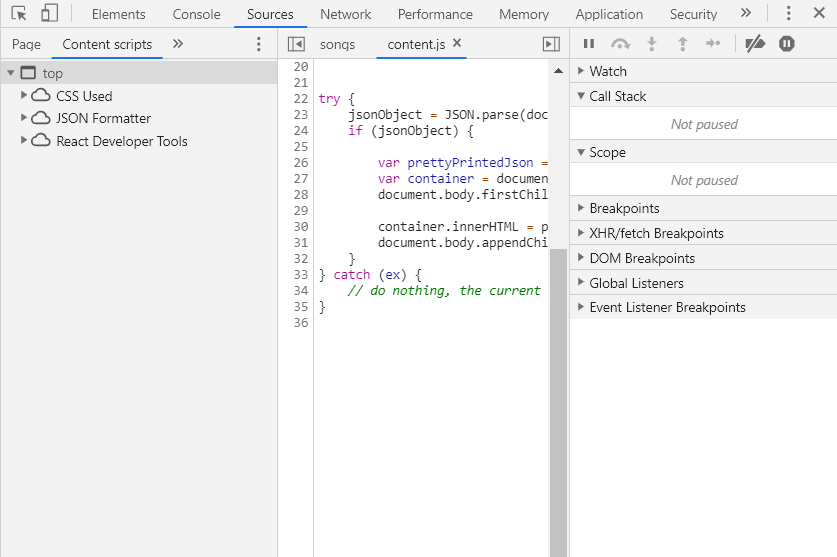
Debugging is exactly the same as normal Javascript debugging in Chrome. Navigate to a tab that is running the extension and press F12. Notice that a new tab is provided for exploring any content scripts that have been injected into the browser page.
